


【摘要】
系统调用是用户程序与操作系统内核交互的核心接口,理解系统调用的工作原理对于深入掌握Linux系统至关重要。本文通过剖析系统调用的完整执行流程,结合实际的代码示例和性能分析,揭示用户空间程序如何安全高效地访问内核服务,为系统级编程和性能优化提供理论基础和实践指导。
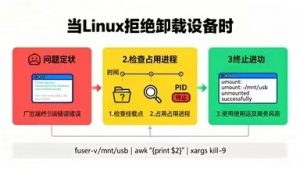
![图片[1]-深入理解Linux系统调用:从用户空间到内核空间的完整交互机制-Vc博客](https://blogimg.vcvcc.cc/2025/10/0035232b46a942dea644a869ca966fb2preview.jpegtplv-a9rns2rl98-downsize_watermark_1_61.jpg?imageView2/0/format/webp/q/75)
一、系统调用基础概念与工作原理
1. 系统调用在操作系统中的位置
系统调用作为用户空间和内核空间的安全桥梁,在Linux架构中处于核心位置。当应用程序需要访问硬件资源或执行特权操作时,必须通过系统调用接口向内核发出请求。
系统调用的基本特征:
- 提供标准的编程接口,隐藏底层硬件差异
- 实现权限隔离,保证系统安全性和稳定性
- 统一的错误处理机制和返回值规范
- 支持跨平台兼容性和向后兼容
2. 系统调用与普通函数调用的区别
#include <stdio.h>
#include <unistd.h>
#include <sys/syscall.h>

void compare_calls(void)
{
    // 普通函数调用 - 在用户空间执行
    printf("这是普通的库函数调用\n");

    // 系统调用 - 通过内核执行
    pid_t pid1 = getpid();      // 库函数包装的系统调用
    pid_t pid2 = syscall(SYS_getpid);  // 直接系统调用

    printf("进程ID: %d (库函数), %d (直接调用)\n", pid1, pid2);
}
二、系统调用的执行流程深度剖析
1. 从用户空间到内核空间的切换
#define _GNU_SOURCE
#include <unistd.h>
#include <sys/syscall.h>
#include <stdio.h>

// 系统调用入口示例
void system_call_workflow(void)
{
    long result;

    // 1. 用户程序准备系统调用参数
    const char *message = "Hello from userspace";

    // 2. 触发软中断或使用syscall指令进入内核
    result = syscall(SYS_write, STDOUT_FILENO, message, 20);

    if (result < 0) {
        perror("系统调用失败");
    } else {
        printf("成功写入 %ld 字节\n", result);
    }
}
2. 完整的系统调用执行路径
系统调用的完整生命周期包括:
- 参数准备阶段:用户程序将系统调用号和参数存入指定寄存器
- 模式切换阶段:通过中断、陷阱或专用指令进入内核模式
- 内核验证阶段:验证参数合法性和用户权限
- 服务执行阶段:执行实际的系统服务
- 结果返回阶段:将执行结果返回用户空间
三、常用系统调用分类与实战示例
1. 文件操作系统调用
#include <fcntl.h>
#include <unistd.h>
#include <sys/stat.h>
#include <stdio.h>
#include <errno.h>
#include <string.h>
void file_operations_demo(void)
{
int fd;
ssize_t bytes;
char buffer[1024];
// 文件创建和写入
fd = open("testfile.txt", O_CREAT | O_WRONLY | O_TRUNC, 0644);
if (fd < 0) {
perror("文件创建失败");
return;
}
const char *data = "文件系统调用测试数据\n";
bytes = write(fd, data, strlen(data));
printf("写入 %zd 字节到文件\n", bytes);
close(fd);
// 文件读取
fd = open("testfile.txt", O_RDONLY);
if (fd >= 0) {
bytes = read(fd, buffer, sizeof(buffer) - 1);
if (bytes > 0) {
buffer[bytes] = '#include <fcntl.h>
#include <unistd.h>
#include <sys/stat.h>
#include <stdio.h>
#include <errno.h>
#include <string.h>
void file_operations_demo(void)
{
int fd;
ssize_t bytes;
char buffer[1024];
// 文件创建和写入
fd = open("testfile.txt", O_CREAT | O_WRONLY | O_TRUNC, 0644);
if (fd < 0) {
perror("文件创建失败");
return;
}
const char *data = "文件系统调用测试数据\n";
bytes = write(fd, data, strlen(data));
printf("写入 %zd 字节到文件\n", bytes);
close(fd);
// 文件读取
fd = open("testfile.txt", O_RDONLY);
if (fd >= 0) {
bytes = read(fd, buffer, sizeof(buffer) - 1);
if (bytes > 0) {
buffer[bytes] = '\0';
printf("从文件读取: %s", buffer);
}
close(fd);
}
// 文件信息获取
struct stat file_stat;
if (stat("testfile.txt", &file_stat) == 0) {
printf("文件大小: %ld 字节\n", file_stat.st_size);
printf("文件权限: %o\n", file_stat.st_mode & 0777);
}
}
';
printf("从文件读取: %s", buffer);
}
close(fd);
}
// 文件信息获取
struct stat file_stat;
if (stat("testfile.txt", &file_stat) == 0) {
printf("文件大小: %ld 字节\n", file_stat.st_size);
printf("文件权限: %o\n", file_stat.st_mode & 0777);
}
}2. 进程管理系统调用
#include <unistd.h>
#include <sys/wait.h>
#include <stdio.h>
#include <stdlib.h>

void process_management_demo(void)
{
    pid_t pid;
    int status;

    printf("父进程PID: %d\n", getpid());

    pid = fork();  // 创建子进程

    if (pid == 0) {
        // 子进程代码
        printf("子进程PID: %d, 父进程PID: %d\n", getpid(), getppid());

        // 执行新程序
        execlp("ls", "ls", "-l", NULL);

        // 如果execlp失败
        perror("execlp失败");
        exit(1);

    } else if (pid > 0) {
        // 父进程代码
        printf("创建子进程: %d\n", pid);

        // 等待子进程结束
        waitpid(pid, &status, 0);

        if (WIFEXITED(status)) {
            printf("子进程正常退出,退出码: %d\n", WEXITSTATUS(status));
        }

    } else {
        perror("fork失败");
    }
}
四、系统调用性能分析与优化策略
1. 系统调用开销测量
#include <stdio.h>
#include <unistd.h>
#include <sys/time.h>
#include <stdlib.h>

// 计算时间差的宏
#define TIME_DIFF(start, end) \
    ((end.tv_sec - start.tv_sec) * 1000000 + (end.tv_usec - start.tv_usec))

void measure_system_call_cost(void)
{
    struct timeval start, end;
    long total_time = 0;
    const int iterations = 100000;

    // 测量getpid系统调用开销
    for (int i = 0; i < iterations; i++) {
        gettimeofday(&start, NULL);
        getpid();
        gettimeofday(&end, NULL);
        total_time += TIME_DIFF(start, end);
    }

    printf("getpid系统调用平均耗时: %.2f 微秒\n",
           (double)total_time / iterations);
}

void measure_context_switch_cost(void)
{
    int pipefd[2];
    pid_t pid;
    char buffer[1];
    struct timeval start, end;

    if (pipe(pipefd) == -1) {
        perror("管道创建失败");
        return;
    }

    pid = fork();

    if (pid == 0) {
        // 子进程
        close(pipefd[1]);  // 关闭写端
        read(pipefd[0], buffer, 1);  // 等待开始信号
        gettimeofday(&start, NULL);
        write(pipefd[0], "D", 1);  // 发送响应
        exit(0);

    } else if (pid > 0) {
        // 父进程
        close(pipefd[0]);  // 关闭读端
        gettimeofday(&start, NULL);
        write(pipefd[1], "S", 1);  // 发送开始信号
        read(pipefd[1], buffer, 1);  // 等待响应
        gettimeofday(&end, NULL);

        long cost = TIME_DIFF(start, end);
        printf("上下文切换耗时: %ld 微秒\n", cost);

        close(pipefd[1]);
        wait(NULL);  // 等待子进程结束
    }
}
2. 减少系统调用次数的优化技术
#include <stdio.h>
#include <unistd.h>
#include <fcntl.h>
#include <sys/uio.h>

void optimization_techniques(void)
{
    // 1. 使用缓冲I/O减少读写系统调用
    FILE *file = fopen("optimized.txt", "w");
    if (file) {
        // 标准I/O库会自动缓冲,减少write系统调用次数
        for (int i = 0; i < 1000; i++) {
            fprintf(file, "Line %d\n", i);
        }
        fclose(file);  // 刷新缓冲区
    }

    // 2. 批量操作示例 - 向量I/O
    int fd = open("vector_io.txt", O_CREAT | O_WRONLY, 0644);
    if (fd >= 0) {
        struct iovec iov[3];
        char *str1 = "Hello ";
        char *str2 = "Vector ";
        char *str3 = "I/O\n";

        iov[0].iov_base = str1;
        iov[0].iov_len = strlen(str1);
        iov[1].iov_base = str2;
        iov[1].iov_len = strlen(str2);
        iov[2].iov_base = str3;
        iov[2].iov_len = strlen(str3);

        // 单次系统调用写入多个缓冲区
        ssize_t written = writev(fd, iov, 3);
        printf("向量写入 %zd 字节\n", written);
        close(fd);
    }
}
五、自定义系统调用开发与实践
1. 简单的自定义系统调用示例
// 注意:以下代码需要内核模块支持,此处仅为原理演示
#define _GNU_SOURCE
#include <unistd.h>
#include <sys/syscall.h>
#include <stdio.h>

// 假设的自定义系统调用号
#ifndef __NR_custom_hello
#define __NR_custom_hello 333
#endif

// 自定义系统调用包装函数
static inline long custom_hello(const char *name)
{
    return syscall(__NR_custom_hello, name);
}

void custom_syscall_demo(void)
{
    printf("测试自定义系统调用...\n");

    long result = custom_hello("Linux Developer");

    if (result < 0) {
        perror("自定义系统调用失败");
        printf("可能需要内核支持或适当权限\n");
    } else {
        printf("自定义系统调用成功,返回值: %ld\n", result);
    }
}
六、系统调用错误处理与调试技巧
1. 全面的错误处理模式
#include <stdio.h>
#include <stdlib.h>
#include <unistd.h>
#include <fcntl.h>
#include <string.h>
#include <errno.h>

void comprehensive_error_handling(void)
{
    int fd;

    // 尝试打开不存在的文件
    fd = open("nonexistent_file.txt", O_RDONLY);
    if (fd < 0) {
        // 详细的错误信息输出
        fprintf(stderr, "文件打开失败: %s (错误码: %d)\n",
                strerror(errno), errno);

        // 根据错误类型采取不同措施
        switch (errno) {
            case ENOENT:
                fprintf(stderr, "文件不存在,尝试创建新文件...\n");
                fd = open("nonexistent_file.txt", O_CREAT | O_WRONLY, 0644);
                if (fd >= 0) {
                    write(fd, "新文件内容\n", 12);
                    close(fd);
                    printf("新文件创建成功\n");
                }
                break;
            case EACCES:
                fprintf(stderr, "权限不足,请检查文件权限\n");
                break;
            default:
                fprintf(stderr, "未知错误,错误码: %d\n", errno);
        }
    } else {
        close(fd);
    }

    // 资源限制检查
    struct rlimit limit;
    if (getrlimit(RLIMIT_NOFILE, &limit) == 0) {
        printf("文件描述符限制: 当前=%ld, 最大=%ld\n",
               limit.rlim_cur, limit.rlim_max);
    }
}
2. 系统调用跟踪与调试
#define _GNU_SOURCE
#include <stdio.h>
#include <unistd.h>
#include <sys/ptrace.h>
#include <signal.h>
#include <sys/wait.h>
#include <sys/user.h>
void trace_system_calls(void)
{
pid_t pid = fork();
if (pid == 0) {
// 子进程 - 被跟踪者
ptrace(PTRACE_TRACEME, 0, NULL, NULL);
raise(SIGSTOP); // 暂停自己,让父进程开始跟踪
// 被跟踪的程序代码
printf("在被跟踪进程中\n");
getpid();
read(0, NULL, 0); // 产生系统调用
} else if (pid > 0) {
// 父进程 - 跟踪者
int status;
wait(&status); // 等待子进程暂停
ptrace(PTRACE_SETOPTIONS, pid, NULL, PTRACE_O_TRACESYSGOOD);
while (WIFSTOPPED(status)) {
struct user_regs_struct regs;
ptrace(PTRACE_GETREGS, pid, NULL, ®s);
// 这里可以检查寄存器内容来了解系统调用
printf("系统调用号: %llu\n", regs.orig_rax);
ptrace(PTRACE_SYSCALL, pid, NULL, NULL);
wait(&status);
}
}
}【总结】
系统调用作为用户空间与内核空间的安全桥梁,在Linux系统中发挥着至关重要的作用。通过深入理解系统调用的工作原理、执行流程和性能特性,开发者可以编写出更高效、更稳定的系统级程序。掌握系统调用的正确使用方法和优化技巧,不仅能够提升程序性能,还能够更好地处理错误情况和进行系统调试。随着Linux内核的持续发展,系统调用接口也在不断演进,为开发者提供更强大、更安全的系统服务访问能力。
© 版权声明
THE END


暂无评论内容